12.1.3. Publishing Your WCF Service from the Command Line
The BizTalk WCF Service
Publishing Wizard is convenient to use when deploying an endpoint within
your development environment. For more advanced users or when
automating your deployment, there is an additional downloadable
command-line tool from Microsoft called the BtsWcfServicePublishing tool.
The tool has the following syntax:
BtsWcfServicePublishing PathName [-AdapterName:value] [-EnableMetadata]
[-ReceiveLocation] [-ApplicationName:value] [-MetadataOnly]
[-MetadataReceiveLocationName:value] [-MergePorts]
[-TargetNamespace:value]
[-Location:value] [-Overwrite] [-Anonymous]
This is a basic sample invocation of this tool:
BtsWcfServicePublishing.exe "MyAssembly.dll"
     -Location:http://localhost/MyVdir -Overwrite
This sample publishes the orchestration in MyAssembly.dll to http://localhost/MyVdir with the default values and overwrites any existing service at this location.
Of course, the default values are not very friendly; therefore, the tool supports many parameters to customize the output. Table 3 lists these parameters.
Table 3. Command-Line Parameters for the BtsWcfServicePublishing Tool
| Parameter | Required | Description |
|---|
| PathName | Yes | Path and file name of BizTalk assembly (*.dll) or WCF service description (*.xml) file. |
| -AdapterName | No | Publishes
a service endpoint. Specify which adapter will be used: WCF-BasicHttp,
WCF-WSHttp, or WCF-CustomIsolated. This field is valid when publishing a
service endpoint.
The default is WCF-WSHttp. |
| -EnableMetadata | No | Enables metadata endpoint in addition to service endpoint. This field is valid when publishing a service endpoint.
The default is False. |
| -ReceiveLocation | No | Creates
receive locations in the specified BizTalk application. This field is
valid when publishing a service endpoint with the BizTalk application
name specified.
The default is False. |
| -ApplicationName | No | Name
of the BizTalk application in which to create receive locations. This
field is valid when publishing a service endpoint with the receive
location specified.
The default is BizTalk Application 1. |
| -MetadataOnly | No | Publishes a metadata-only endpoint. This field is valid when publishing a service endpoint.
The default is False. |
| -MetadataReceiveLocationName | No | Name
of WCF-adapter receive location to expose at metadata-only endpoint.
You can further edit it in Web.config after publishing. This field is
valid when publishing a metadata endpoint.
The default is Null. |
| -MergePorts | No | Merges all ports into a single WCF service if possible.
The default is False. |
| -TargetNamespace | No | Target namespace of WCF service.
The default is http://tempuri.org. |
| -Location | No | Location in which to publish. For example, http://host[:port]/path. This is automatically generated based on the project name. |
| -Overwrite | No | Overwrites (deletes contents of) specified location.
The default is False. |
| -Anonymous | No | Allows anonymous access to WCF service.
The default is False. |
4. Consuming WCF Services
Just as there is a wizard
to help you publish a WCF service, there is also a BizTalk WCF Service
Consuming Wizard. You can launch this wizard from within the
orchestration designer; it creates port types and message types
necessary for consuming WCF services. The wizard also creates two
binding files that can be imported by the development command-line tool
or wizard to configure the send ports with the system-provided binding
WCF adapters and the WCF-Custom adapter.
To add schemas and types for WCF services to your orchestration, follow the steps described in the following subsections.
4.1. Step 1: Start the Biztalk WCF Consuming Wizard
In the Solution Explorer,
right-click your project, click Add, and select Add Generated Items. In
the Add Generated Items dialog box, select Consume WCF Service, and
click Add to launch the wizard.
4.2. Step 2: Import Metadata
Click Next on the welcome screen to display the Metadata Source screen, as shown in Figure 5.
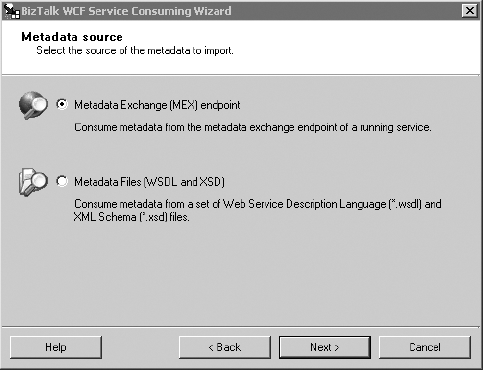
The easier option is to
use a MEX endpoint, which will dynamically download the WSDL and
supporting XSDs. If you have previously downloaded or been provided with
these files, then choose the Metadata Files option. Leave the default
option, and click Next.
4.3. Step 3: Supply a Metadata URL
On the Metadata Endpoint screen, enter the URI to the metadata endpoint you want to include, and click Next.
|
The metadata endpoint doesn't have to be over HTTP or HTTPS. The wizard also supports net.tcp and net.pipe URIs.
|
|
4.4. Step 4: Complete the Wizard
After the WSDL has been
downloaded, click Next to complete the wizard. The necessary port types
and message types will be created and ready to use within your
orchestration. Simply bind your message types to an orchestration port
and connect to shapes.
5. Specifying Dynamic Port Properties
As with other adapters,
the WCF adapters support dynamic send ports. These are useful for
customizing parameters of WCF calls with runtime values that may be
passed with incoming messages or as a result of a business rule.
The following code demonstrates how to modify the transport security option of a WCF-NetTcp adapter:
MessageOut=MessageIn;
MessageOut(WCF.Action)="http://tempuri.org/IReceiveMessage/ReceiveMessage";
MessageOut(WCF.SecurityMode)="Transport";
MessageOut(WCF.TransportClientCredentialType)="Windows";
DynamicSendPort(Microsoft.XLANGs.BaseTypes.Address)=
     "net.tcp://localhost:8001/netTcp";
DynamicSendPort(Microsoft.XLANGs.BaseTypes.TransportType)="WCF-NetTcp";
Using the WCF context
object, all properties of the WCF adapter can be dynamically changed if
necessary to meet your requirements. The previous example tells the
adapter to implement transport-level security leveraging the Windows
identity as its credential token. The code also overrides the WCF
endpoint address and sets the transport type to the WCFNetTcp adapter.
