To preserve all your hard work—particularly
if others use your files—protect it with a password. You can protect a
sheet or an entire workbook. In each case, you’ll be asked to supply a
password, and then enter it again when you want to work on the file.
Passwords are case sensitive, so be sure to supply your password as it
was first entered. If you forget a password, there is no way to open
the file, so it’s very important to remember or write down your
password(s). Keep your password in a safe place. Avoid obvious
passwords such as your name, your company, or your favorite pet.
Apply a Password to a Worksheet
- 1. Click the Review tab.
- 2. Click the Protect Sheet button.
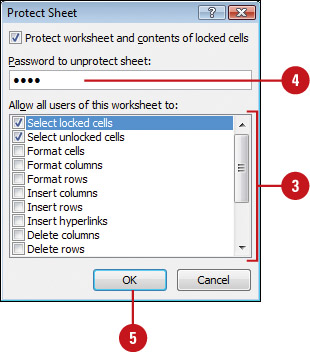
- 3. Select the check boxes for the options you want protected in the worksheet.
- 4. Type a password.
- 5. Click OK.

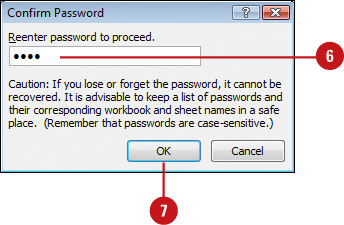
- 6. Retype the password.
- 7. Click OK.

Did You Know?
You can protect workbook elements.
Click the Review tab, click the Protect Workbook button, and then
select or clear the Structure or Windows check boxes. Select the
Structure check box to prevent users from viewing, copying, moving, or
inserting worksheets. It also prevents users from recording new macros,
displaying data from PivotTable reports, using analysis tools, or
creating scenario summary reports. Select the Windows check box to
prevent users from moving, resizing, or closing windows.
Apply a Password to Edit Parts of a Worksheet
- 1. Select the range in which you want to apply a password.
- 2. Click the Review tab.
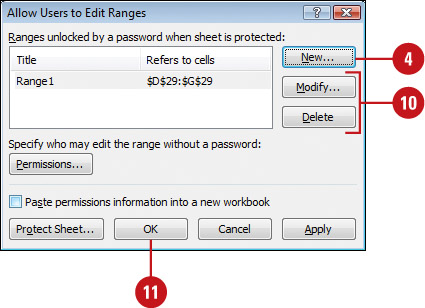
- 3. Click the Allow Users to Edit Ranges button.
- 4. Click New.
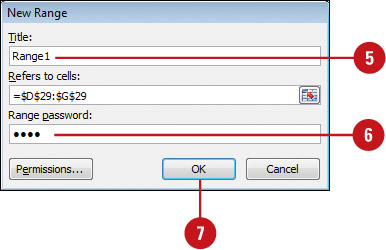
- 5. If you want, type a range title.
- 6. Type a range password.
- 7. Click OK.
- 8. Retype the password.
- 9. Click OK.
- 10. To modify or delete a range, click a range, and then click Modify or Delete.
- 11. Click OK.


Did You Know?
You can quickly unprotect a worksheet or workbook. Click the Review tab, click the Unprotect Worksheet or Unprotect Workbook button, type the password, and then click OK.