The Deployment Image Servicing and
Management (DISM) tool is included with the WAIK and can be used to
perform offline maintenance of images. Offline maintenance means that
you don't need to boot into the image to make changes, but can instead
modify the contents of an image file that is stored within a WIM file.
You can apply this modified image to a system with the changes.
For example, if you followed the previous procedures
using ImageX to capture an image, you can now use DISM to modify the
contents of the image without having to apply the image to a system and
booting into the system. Additionally, you don't have to recapture the
image. If you use DISM to open the image in read/write mode, you can
save the changes with DISM.
The steps for modifying an image with DISM are as follows:
Mount
the image using DISM. This expands the image into a folder on your hard
drive. All the files and folders that are stored on the original hard
drive of the captured image are accessible here.
Modify
the image. You can do so using DISM. DISM allows you to add and remove
drivers, packages, and features. Additionally, you can copy files and
folders directly into the mounted image.
After completing the modifications, commit the image. This step rewrites the image file with your changes.
|
DISM is not case sensitive, but options are case
sensitive. When entering DISM commands, you can usually enter them as
all uppercase, all lowercase, or a combination of the two. It's common
to show the documentation with initial caps for words, but this is just
for readability. For example, the following three commands are
interpreted the same by DISM:
DISM /Get-WimInfo /WimFi1e:C:\Images\Insta11.wim
dism /get-wiminfo /wimfi1e:c:\images\insta11.wim
DISM /GET-WIMINFO /WIMFILE:C:\IMAGES\INSTALL.WIM
However, there are some exceptions. For example,
when working with features in an offline image, you need to use the
exact case of the feature such as InboxGames, instead of inboxgames, or
Solitaire instead of solitaire. If you don't follow the exact case of
the feature, the command won't be recognized.
|
While this section covers many of the basic
capabilities of DISM, there is much more you may want to dig into. You
can open the Windows Automated Installation Kit (WAIK) Users Guide for
Windows 7, which is installed when you install the WAIK, and take a
look at the following help articles for additional information:
Deployment Image Servicing and Management Command-Line Options
Driver Servicing Command-Line Options
Operating System Package Servicing Command-Line Options
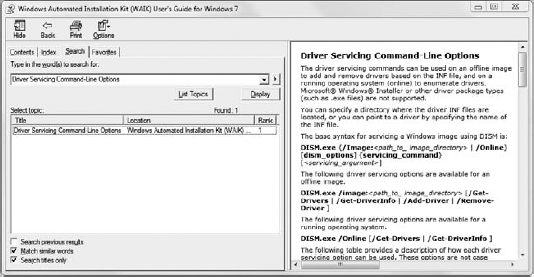
The easiest way to locate these articles is to
select the Search tab, enter the article title in the search text box,
select the Search Titles check box in the lower-left corner, and click
List Topics. Figure 1 shows this done for the Driver Servicing Command-Line Options article.
1. Viewing Information about an Image with DISM
When using DISM, you'll frequently use the /WimFile switch. This points to the image file with the full path in the following format:
/WimFi1e:Drive:Fu11Path\ImageName.wim
For example, if an image file named install.wim is stored in the Images folder on the C: drive, it would take the following format. Notice that there are no spaces anywhere in this switch:
/WimFi1e:C:\Images\Insta11.wim
The following example shows the /WimFile switch used with the /Get-WimInfo switch to retrieve information on an image file. In this example, the install.wim file from the \sources folder of the Windows 7 installation DVD is copied into the C:\Images folder.
DISM /Get-WimInfo /WimFi1e:C:\Images\Insta11.wim

Deployment Image Servicing and Management tool
Version: 6.1.7600.16385

Details for image : C:\Images\Install.wim

Index : 1
Name : Windows 7 STARTER
Description : Windows 7 STARTER
Size : 7,936,340,784 bytes

Index : 2
Name : Windows 7 HOMEBASIC
Description : Windows 7 HOMEBASIC
Size : 7,992,394,907 bytes

Index : 3
Name : Windows 7 HOMEPREMIUM
Description : Windows 7 HOMEPREMIUM
Size : 8,432,859,356 bytes

Index : 4
Name : Windows 7 PROFESSIONAL
Description : Windows 7 PROFESSIONAL
Size : 8,313,318,889 bytes

Index : 5
Name : Windows 7 ULTIMATE
Description : Windows 7 ULTIMATE
Size : 8,471,060,645 bytes

The operation completed successfully.
This output is a lot easier to digest than the ImageX XML output shown earlier. It's interesting to note that the queried install.wim
file is about 2.2 GB when stored on a disk. However, it holds the
contents of these five installation images, and each of the images will
expand to about 8 GB.
All image files don't include multiple images. For example, if you captured the image using ImageX earlier, the Win7.wim file would have only one image with a name of Mastering Windows 7. If you copied that image to the Images folder on your computer, you could use the following command to view its details:
DISM /Get-WimInfo /WimFi1e:C:\Images\win7.wim

Deployment Image Servicing and Management tool
Version: 6.1.7600.16385

Details for image : C:\Images\win7.wim

Index : 1
Name : Mastering Windows 7
Description : <undefined>
Size : 9,759,693,132 bytes

The operation completed successfully.
