Although the Windows SBS 2011 setup program automatically installs and configures Exchange
Server 2010, you might want to perform some additional configuration
tasks, which are described in the following sections.
1. Configure a Smart Host for Internet Email
The Internet email
transmission process, might seem
quite complicated, but it actually is quite efficient under ideal
conditions. However, if a destination mail server is not available to
receive messages, Exchange Server must keep retrying the transmission
until it reaches its timeout interval. This means that the delivery of a
single email could require the server to transmit dozens of messages
over the network’s Internet connection. Multiply this by the hundreds or
thousands of email messages that the server sends every day, and you
can see how this can bog down the server’s performance and consume a
significant amount of Internet bandwidth.
Another problem with this arrangement is the fact that many Internet servers assume that messages originating from dynamic IP addresses are spam. Most ISPs assign dynamic
IP addresses to their clients, including the broadband routers that
Windows SBS 2011 networks typically use to access the Internet.
Therefore, you might find that some of your outgoing email messages are
failing to reach their destinations because intermediate servers are
discarding them as spam.
One way to overcome these problems is to use a smart host to transmit your Internet email. A smart host
is an SMTP server, typically supplied by your ISP, that functions as an
interim mail stop for your domain. You configure Exchange Server to
send all its outgoing mail to the smart host, and the smart host is then
responsible for transmitting and retransmitting the individual messages
to their destinations as needed. In addition, because the smart host
has a static IP address, its traffic is less likely to be perceived as
spam.
The Getting started tasks
list in the Windows SBS Console provides access to a wizard that
configures Exchange Server 2010 to use a smart host. To run this wizard,
perform the following:
Log
on to your Windows SBS 2011 primary server using an account with
network Administrator privileges. The Windows SBS Console appears.
On the Home page of the Windows SBS Console, click Configure a smart host for Internet e-mail. The Configure Internet Mail Wizard appears, displaying the Before You Begin page.
Tip:
The Configure Internet Mail
Wizard is also accessible from the Network/Connectivity page of the
Windows SBS Console. To start the wizard, click Smart host for Internet e-mail in the Internet E-Mail section.
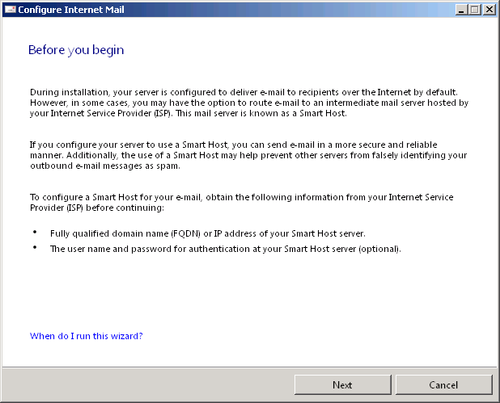
The Before You Begin page lists the resources you must have to complete the wizard, which include the FQDN or IP address of the smart
host you intend to use. You obtain this information from your ISP or
other provider. In most cases, ISPs require authentication to access the
mail server, so you need a user name and password as well.
Click Next. The Specify Settings For Outbound Internet Mail page appears.
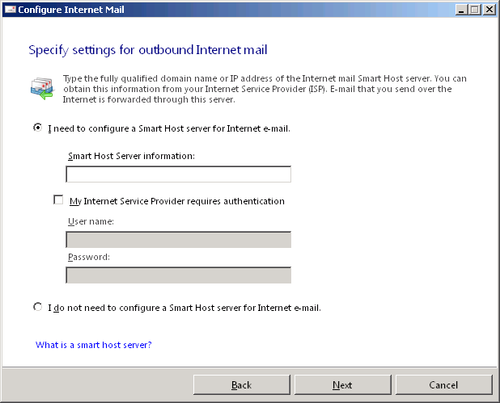
Leave the I need to configure a smart host server for Internet e-mail option selected and, in the Smart host server information text box, type the name or IP address of the server you want to use.
If necessary, select the My Internet service provider requires authentication check box and, in the User name and password text boxes, type the credentials for the server, as supplied by your ISP.
Click Next. The Configuring
Internet E-Mail Settings page appears as the wizard attempts to contact
the server you specified. If the attempt succeeds, the Configure Internet Mail Settings Is Complete page appears.
If
the wizard cannot connect to the server, it specifies the nature of the
problem, such as a nonexistent server or rejected credentials, allows
you to correct your settings, and tries again. Keep altering your
settings until the wizard connects.
Click Finish. The wizard closes.
2. Using the POP3 Connector
One of the byproducts of the email
age is the proliferation of email addresses that people tend to gather.
The Add A New User Account Wizard creates a new mailbox for each user
on the network, but he or she might already have other email addresses
as well, addresses from personal accounts or other affiliations. There
are two ways to incorporate email from other sources into users’
Exchange Server mailboxes:
In addition to functioning as an
Exchange Server client, Office Outlook is a POP3 and IMAP4 client. When
you add a POP3 account to an Outlook client that is already configured
to access an Exchange Server mailbox, you can integrate the messages
downloaded from the POP3 server into the mailbox so that the program
permanently stores them on the Exchange Server computer. With this
arrangement, you must configure each individual client with the
appropriate configuration settings for the POP3 account, and the system
can check the POP3 server for new messages only while the client is
running on the workstation.
The POP3 Connector is
essentially a multiuser POP3 client that runs on Exchange Server, which
you configure with the account information for each of your users. The
POP3 Connector checks each of the POP3 accounts at scheduled intervals,
downloads new messages, and deposits them in the correct users’
mailboxes. With the POP3
Connector, server administrators manage the account information, and
the connector runs all the time, downloading new messages even when the
clients are not logged on to the network.
To use the POP3
Connector, you must have the server name and user credentials for each
POP3 account you want the server to access. To configure the POP3
Connector, follow these steps:
Log
on to your Windows SBS 2011 primary server using an account with
network Administrator privileges. The Windows SBS Console appears.
Click Network, and then select the Connectivity tab.

Under Windows SBS POP3 Connector, select the POP3 Connector item, and in the Tasks list, click View POP3 Connector properties. The Windows
SBS POP3 Connector dialog box appears. You must add each POP3 account
you want the connector to access to the POP3 Mailboxes list.

With the Mail accounts tab selected, click Add. The Pop3 Mailbox Accounts dialog box appears.
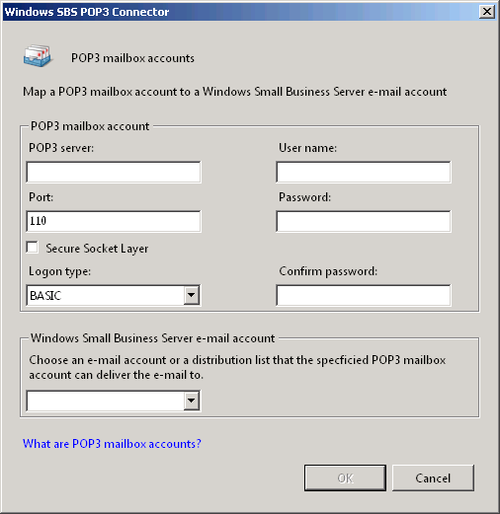
In the POP3 mailbox account box, configure the following settings:
POP3 server Specifies the name or IP address of the Internet server hosting the POP3 mailbox you want to access.
Port Specifies the port number the server is using for POP3 traffic. The default value is 110.
Secure Socket Layer Configures SSL encryption for the POP3 connection, if the server supports it.
Logon type Specifies which of the following authentication methods you want the server to use when connecting to the POP3 server: Basic, Secure Password Authentication (SPA), or Authenticated Post Office Protocol (APOP).
Note:
The Basic option uses plain text authentication, SPA
encrypts the password before transmission, and APOP combines the
password with a timestamp before encrypting it. This is done to create a
unique value during each logon. APOP is more secure than SPA because it
prevents potential attackers from capturing the encrypted passwords and
replaying them. However, you must make sure that the POP3 server
supports SPA or APOP authentication before you select these options.
User name Specifies the account name you want the server to use when logging on to the POP3 server.
Password and Confirm Password Specify the password associated with the user name.
In the Windows Small Business Server e-mail account drop-down list, select the mailbox to which the connector should deposit the downloaded messages.
Click OK. The new account appears in the POP3 Mailboxes list.
Repeat steps 4 through 7 to configure additional POP3 mailboxes.
Click the Scheduling tab.
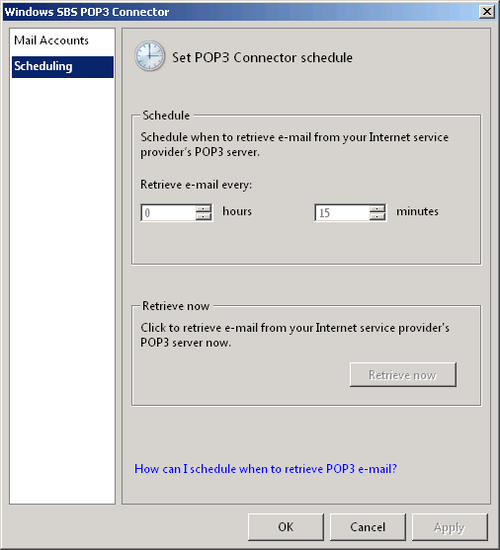
In the Schedule box, specify the interval at which the server should check the POP3 accounts for new mail.
Tip:
You can also trigger an immediate check of the POP3 accounts by clicking Retrieve now.

