If you prefer a visible signature line instead of an
invisible digital signature, you can insert a visible signature line
along with a digital certificate of authenticity. Signature lines allow
you to create a paperless signature process for workbooks, such as
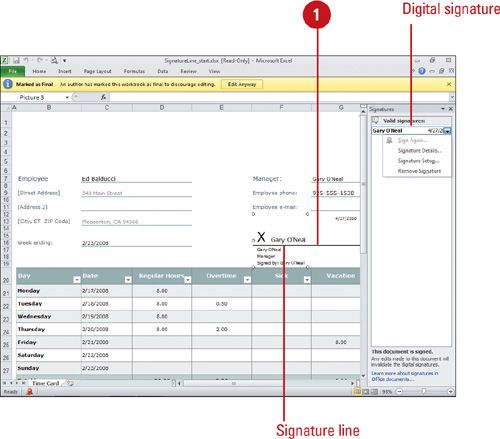
contracts. A visible signature line looks like a typical signature line
with a name, a date and a line for a signature. When you send a
workbook out with a signature request, the signer sees a signature line
and a notification request with instructions. The signer can type—or
ink with a Tablet PC—a signature next to the X,
or select a signature image. To add a signature line and digital
signature at the same time, first you insert a signature line into your
workbook, and then you sign it.
Add a Signature Line
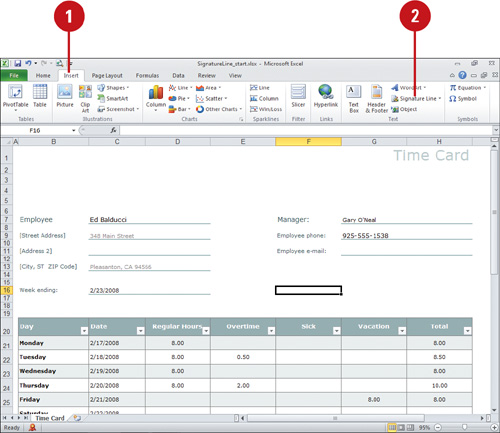
- 1. Click the Insert tab.
- 2. Click the Signature Line button arrow, and then click Microsoft Office Signature Line.
 - 3. If an alert message appears, click Signature Services from the Office Marketplace to open an informational Web site where you can sign up for a digital certificate, or click OK to create your own.
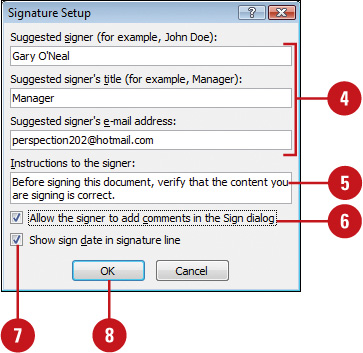
- 4. Type information about the person who will be signing on this signature line.
- 5. If you want, type any instructions for the signer.
- 6. To show the signature date, select the Allow the signer to add comments in the Sign dialog check box.
- 7. To show the signature date, select the Show sign date in signature line check box.
- 8. Click OK.

Sign the Signature Line
- 1. Double-click the signature line that needs a signature.
 - 2. To add a printed version of your signature, type your name.
If you have a Tablet PC, you can sign your name.
- 3. To select an image of your written signature, click Select Image, navigate to the signature image, and then click Select.
- 4. Click Sign.

|