Logo
HOW TO
Windows XP
Windows Vista
Windows 7
Windows Azure
Windows Server
Windows Phone
 
 
Windows Server

Microsoft Dynamics CRM 4 : Digital Phone Integration (part 3) - c360 CTI for Microsoft CRM

5/5/2013 6:32:22 PM

2.3 c360 CTI for Microsoft CRM

c360 CTI (Computer Telephony Integration) is a third-party application that enables integration between telephone systems (via TAPI) and Microsoft Dynamics CRM. Similar to the Cisco and Avaya products, this product also detects incoming phone calls (displays the caller’s name and number), automatically produces activities for incoming and outgoing calls, and much more. The CTI provides the following capabilities:

  • Connects telephone systems with Microsoft Dynamics CRM

  • Detects incoming calls and displays caller information

  • Opens a contact or an account upon the lifting of the receiver

  • Creates activities for incoming and outgoing calls

  • Simplifies the process of making outgoing calls

This CTI application has been successfully tested on the following phone systems:

  • Alcatel OmniPCX Office

  • Nortel BCM 50

  • Siemens HiPath 3550 5.0

  • 3com VoIP system SuperStack 3 NBX Networked Telephony

  • TeleVantage 6

  • Avaya S8500 Communication Manager 3.1

To install c360 CTI, you first need to install the server component, as follows:

1.
Download the setup from the c360 website. (Typically, the setup is sent in an email to every customer.) Then launch the setup by running Telephone Integration Setup.msi.

2.
On the Welcome screen, click Next.

3.
Select English on the Language Selection screen, and then click Next.

4.
On the Destination Folder screen, select the appropriate location for the installation, and then click Next.

5.
On the Ready to Install the Program screen, click Install.

Once the files are copied to the server, a server connection configuration screen will display, as shown in Figure 12.

Figure 12. c360 server connection configuration screen.


6.
Enter the appropriate server name and organization, and then click OK.

7.
During the installation, configure ISV.config. Select the appropriate entities that require CTI within your organization (see Figure 13).
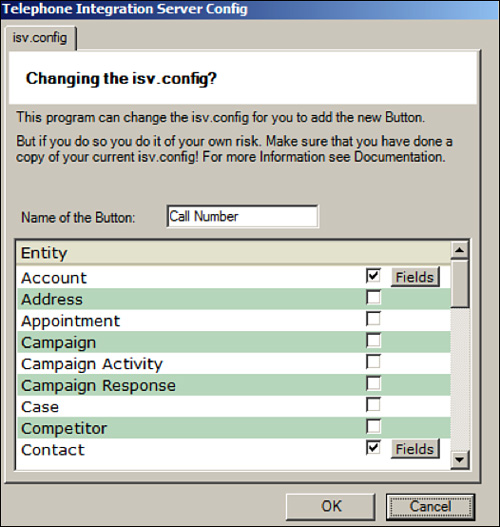
Figure 13. c360 server ISV configuration screen.


8.
By default, Accounts and Contacts is selected. You can make any changes if needed.

9.
Click Finish to complete the installation.

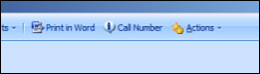
After the server component has been installed, you will see the Call Number button shown in the Figure 14

Figure 14. Account screen with the Call Number button.


System administrators may change the configuration if desired at a later stage. To configure additional settings for c360, follow these steps:

1.
Click Start.

2.
Click All Programs.

3.
Click c360.

4.
Click Telephone Integration for MSCRM 4.

5.
Click Telephone Integration Setup to launch the same configuration as shown during setup (refer back to Figure 7.13).

Note

Click the Fields button to view the more advanced functions (to select the fields to search) that are available.


To install the client component, follow these steps:

1.
Locate the installer and launch setup.

2.
On the Welcome screen, click Next.

3.
Agree to the license agreement, and then click Next.

4.
Select English on the Language screen.

5.
Select the following in the Startup Options screen:

Automatically Start TI When Windows Starts.

Start TI After Setup.

Then click Next.

6.
Choose the installation folder, and then click Next.

7.
Click Install to begin installation

8.
Enter the following server connection options (see Figure 15):

MSCRM Server.

Organization.

Then click OK.

Figure 15. Client connection configuration.


9.
Select the appropriate TAPI device. Figure 16 shows all the TAPI devices available from the Windows system.

Figure 16. Client TAPI selection screen from c360.


10.
Click Finish.

3. Logging Call Actions

With CTI, the incoming and outgoing calls are automatically logged in the Microsoft Dynamics CRM system. Figure 7.17 shows the log of the phone calls in the CRM database. The creation of the activities happens automatically; this action is performed with the security context of the person placing or receiving the phone call.

Figure 17. Sample calls logged for a specific entity.

The following attributes about the call are automatically logged in Microsoft Dynamics CRM:

  • Start time

  • Duration

  • Call direction (incoming/outgoing)

  • Call priority (set to Normal by default)

  • Activity status (set to Open by default)

  • Sender (CRM user placing or receiving the call)

  • Owner (CRM user placing or receiving the call)

  • Regarding (customer record participating in the call)


Other -----------------
- BizTalk Server 2006 : Starting a New BizTalk Project - BizTalk Naming Conventions
- BizTalk Server 2006 : Starting a New BizTalk Project - BizTalk Assembly Naming and Versioning
- Windows Server 2003 : Protecting Hosts with Windows Host Firewalls - Protocol Filters
- Windows Server 2003 : Protecting Hosts with Windows Host Firewalls - Routing and Remote Access Basic Firewall
- System Center Configuration Manager 2007 : Customizing Configuration Manager Reports (part 3) - Reporting on Custom Data
- System Center Configuration Manager 2007 : Customizing Configuration Manager Reports (part 2) - Customizing Report Data Selection
- System Center Configuration Manager 2007 : Customizing Configuration Manager Reports (part 1) - Customizing Report Layout and Display
- System Center Configuration Manager 2007 : Reporting - Dashboards
- Client Access to Exchange Server 2007 : Getting the Most Out of the Microsoft Outlook Client - Deploying Outlook 2007
- Client Access to Exchange Server 2007 : Getting the Most Out of the Microsoft Outlook Client - Understanding RPC Over HTTPS in Outlook 2007
 
 
REVIEW
- First look: Apple Watch

- 10 Amazing Tools You Should Be Using with Dropbox

- 3 Tips for Maintaining Your Cell Phone Battery (part 1)

- 3 Tips for Maintaining Your Cell Phone Battery (part 2)
 
VIDEO TUTORIAL
- How to create your first Swimlane Diagram or Cross-Functional Flowchart Diagram by using Microsoft Visio 2010 (Part 1)

- How to create your first Swimlane Diagram or Cross-Functional Flowchart Diagram by using Microsoft Visio 2010 (Part 2)

- How to create your first Swimlane Diagram or Cross-Functional Flowchart Diagram by using Microsoft Visio 2010 (Part 3)
 
Popular tags
Microsoft Access Microsoft Excel Microsoft OneNote Microsoft PowerPoint Microsoft Project Microsoft Visio Microsoft Word Active Directory Biztalk Exchange Server Microsoft LynC Server Microsoft Dynamic Sharepoint Sql Server Windows Server 2008 Windows Server 2012 Windows 7 Windows 8 Adobe Indesign Adobe Flash Professional Dreamweaver Adobe Illustrator Adobe After Effects Adobe Photoshop Adobe Fireworks Adobe Flash Catalyst Corel Painter X CorelDRAW X5 CorelDraw 10 QuarkXPress 8 windows Phone 7 windows Phone 8 BlackBerry Android Ipad Iphone iOS
Popular keywords
HOW TO Swimlane in Visio Visio sort key Pen and Touch Creating groups in Windows Server Raid in Windows Server Exchange 2010 maintenance Exchange server mail enabled groups Debugging Tools Collaborating
Top 10
- Microsoft Excel : How to Use the VLookUp Function
- Fix and Tweak Graphics and Video (part 3) : How to Fix : My Screen Is Sluggish - Adjust Hardware Acceleration
- Fix and Tweak Graphics and Video (part 2) : How to Fix : Text on My Screen Is Too Small
- Fix and Tweak Graphics and Video (part 1) : How to Fix : Adjust the Resolution
- Windows Phone 8 Apps : Camera (part 4) - Adjusting Video Settings, Using the Video Light
- Windows Phone 8 Apps : Camera (part 3) - Using the Front Camera, Activating Video Mode
- Windows Phone 8 Apps : Camera (part 2) - Controlling the Camera’s Flash, Changing the Camera’s Behavior with Lenses
- Windows Phone 8 Apps : Camera (part 1) - Adjusting Photo Settings
- MDT's Client Wizard : Package Properties
- MDT's Client Wizard : Driver Properties
 
Windows XP
Windows Vista
Windows 7
Windows Azure
Windows Server
Windows Phone
2015 Camaro