Creating and managing backup jobs
We will start by creating a new scheduled backup job
that will backup the data on our server, using the bare meta recovery
option which will backup all data on the server including the operating system configuration. To create a new backup job, perform the following:
1. | Open Windows Server backup from Start | All Programs | Accessories | System Tools | Windows Server Backup.
|
2. | In the Actions Pane, click the Backup Schedule link. This will launch the Backup Schedule Wizard.
|
3. | Click Next to begin.
|
4. | Choose
the backup type you want to perform. A full backup will back up all
data on all drives as well as system state. The custom backup will
allow you to select what items you want to backup. For this exercise,
choose the Custom option. Then click Next.
|
5. | On the Select Items for Backup page, click Add Items. |
6. | Select the Bare Metal Recovery option (see Figure 3).
This will backup all data and allow you to perform a bare metal restore
of the server. A bare metal recovery allows you to completely recover
the full operating system and configuration, along with data, to a new
server in the event that the primary server fails. Click OK. Then click Next.

|
7. | The
next step is to determine when and how often to backup the data. After
selecting the times and how often to backup the data, click Next to continue.
|
8. | You now must select where you want to save your backups. Data can be backed up to one of the following locations:
- Back up to a hard disk that is dedicated for backups —Using this option will store backups to a hard disk connected to the server. Windows
Server Backup will format the disk and it can be used only to store
backups. This method will allow you to save multiple copies of backups
and backup and restore processes take less time than if using a volume
or shared network folder to save backups. You should be aware that by
using this method, if the server fails and the disk drive becomes
unusable, both the primary system and the backups are lost.
- Back up to a volume
—This option is similar to the back up to hard disk method except you
are not required to dedicate the disk drive to backups only. Be aware
that using this method will however decrease the performance of any
other activity on the volume while backups are running.
- Back up to a shared network folder
—Using this option, you can save backups to a network shared folder.
This allows you to save backups on another server. In the event that
the primary server fails, the backup data will be located on a disk
drive on another server. Backing up to a network shared folder limits
you to saving only on backup. Each backup process will overwrite the
previous backup.
For this exercise, we will choose to backup data to a network shared
folder. When performing a bare metal restore, we will refer to this
same network location for the restored data. Select Back up to a shared network folder and then click Next. |
9. | Enter the UNC network path where you want to save the backup. For example, \\BackupServer\BackupData and then click Next. If prompted for username and password, enter credentials that have access to read and write to the shared folder.
|
10. | Verify the backup settings, and then click Finish to schedule the backup job.
|
The backup job should run at the scheduled time and
perform a full backup of the system allowing restore of data and/or
full restore to a new server. Let us go through the process of
performing a bare metal restore on a new server. Before we begin the
process, you will need a Windows Server 2008 R2 DVD on hand to boot the
new server from. Perform the following to steps to complete a bare
metal restore of a server:
1. | Boot the server from the Windows Server 2008 R2 DVD.
|
2. | On the initial screen click Next to begin.
|
3. | Click the link Repair your computer (see Figure 4)

|
4. | Select the option to Restore your computer using a system image that you created earlier. Then click Next.
|
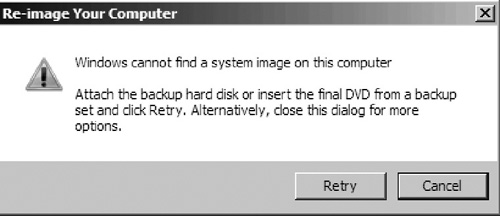
5. | When prompted that Windows cannot find a system image on this computer (see Figure 5), click Cancel. This will allow you to select a location where the backup is stored.
|
6. | Click Next to select a system image.
|
7. | You now need to select the network location for your image. This will require connecting the server to the network. Click the Advanced button and then click Search for a system image on the network.
|
8. | When prompted, enter the UNC path to the network shared folder (see Figure 6)

|
9. | Enter the username and password for an account that has access to the shared folder.
|
10. | Select the backup image listed (see Figure 7). Then click Next.

|
11. | Select the backup set you want to restore. Then click Next. |
12. | You can additionally set other restore options such as install drivers or exclude specific disks from the restore. Click Next to continue.
|
13. | Verify the restore settings, and then click Finish to begin the restore process. If prompted to overwrite existing drives, you will need to click Yes to allow the backup to overwrite data on the disks. Keep in mind that any data on the existing disks will be destroyed.
|
When the restore is complete, the server
will automatically reboot. After the new server completes the startup
process, it should be in the same state as the original server at the
time of backup.
