In Microsoft Windows, both the operating system and applications add events to event
logs. Most of these events are informational (such as an event indicating that the computer is
starting up) and can be safely ignored. However, very important events are often buried within
thousands of insignificant events. These important events might indicate an impending hard disk
failure, a security compromise, or a user who cannot access critical network resources.
Every computer running Windows has a local event log. Because enterprises often have
thousands of computers, each with its own local event log, monitoring significant events was
very difficult with earlier versions of Windows. Event forwarding in
Windows Vista and Windows 7 makes it much easier for enterprises to manage local event logs.
With event forwarding, you can configure computers running Windows to forward important
events to a central location. You can then more easily monitor and respond to these centralized
events.
1. How Event Forwarding Works
Event forwarding uses Hypertext Transfer Protocol (HTTP) or HTTPS (Hypertext Transfer Protocol Secure), the same protocols used to browse Web
sites, to send events from a forwarding computer (the computer that is
generating the events) to a collecting computer (the computer that is
configured to collect events). With event forwarding, you can send important events from any
computer in your organization to your workstation, so that you can monitor the events from a
central location.
Even though HTTP is normally unencrypted, event forwarding sends communications encrypted
with the Microsoft Negotiate security support provider (SSP) in workgroup environments or the Microsoft Kerberos SSP in domain environments. HTTPS uses a Secure Sockets Layer (SSL) certificate (which you will need to generate) to provide
an additional layer of encryption. This additional layer of encryption is unnecessary in most
environments.
Note:
MORE INFO
MORE ABOUT SSP PROVIDERS
For more information about SSP providers, read
http://msdn2.microsoft.com/en-us/library/aa380502.aspx.
Tip:
EXAM TIP
For the exam, remember that event forwarding uses encryption even
if you choose the HTTP protocol. That's counterintuitive because when you use HTTP to browse
the Web, it's always unencrypted.
2. How to Configure Event Forwarding in AD DS Domains
To forward events, you must configure both the forwarding and collecting computers. The forwarding computer is the computer that generates the events, and the collecting computer is the management workstation that administrators use
to monitor events. The configuration you create for forwarding and collecting events is called an
event subscription.
Event forwarding is not enabled by default on Windows 7. Before you can use event
forwarding, both the forwarding and collecting computer must have two services running:
In addition, the forwarding computer must have a Windows Firewall exception for the HTTP protocol.
Depending on the event delivery optimization technique you choose, you might also have to
configure a Windows Firewall exception for the collecting computer. Fortunately, Windows 7
provides tools that automate the configuration of forwarding and collecting computers.
The sections that follow describe step by step how to configure computers for event
forwarding.
2.1. How to Configure the Forwarding Computer
To configure a computer running Windows 7 to forward events, follow these steps on the
forwarding computer:
Open a command prompt with administrative privileges by clicking Start, typing cmd, and
pressing Ctrl+Shift+Enter.
Tip:
OPENING AN ADMINISTRATIVE COMMAND PROMPT
You can also open an administrative command prompt by
right-clicking the command prompt in the Start menu and clicking Run As Administrator.
Pressing Ctrl+Shift+Enter is just a shortcut to make the process quicker (especially for
those who prefer to use the keyboard over the mouse).
At the command prompt, run the following command (shown in bold) to configure the Windows Remote Management service:
C:\>winrm quickconfig
WinRM is not set up to receive requests on this machine.
The following changes must be made:
Set the WinRM service type to delayed auto start.
Start the WinRM service.
Make these changes [y/n]?
Type Y, and then press Enter. The Windows Remote
Management service prompts you again:
WinRM has been updated to receive requests.
WinRM service type changed successfully.
WinRM service started.
WinRM is not set up to allow remote access to this machine for management.
The following changes must be made:
Create a WinRM listener on HTTP://* to accept WS-Man requests to any IP on this
machine.
Enable the WinRM firewall exception.
Make these changes [y/n]?
Type Y, and then press Enter. The Windows Remote
Management service prompts you again.
WinRm (the Windows Remote Management command-line tool) configures the computer to accept WS-Management requests from other computers. This involves making the following changes:
Sets the Windows Remote Management (WS-Management) service to Automatic (Delayed Start) and starts the service.
Configures a Windows Remote Management HTTP listener. A listener
is a configuration setting that forwards specific incoming network communications
to an application.
Creates a Windows Firewall exception to allow incoming connections to the Windows
Remote Management service using HTTP on Transmission Control Protocol (TCP) port 80. This
exception applies only to the Domain and Private profiles; traffic will still be blocked
while the computer is connected to Public networks.
Note:
AUTOMATIC (DELAYED START)
Starting with Windows Vista, services could start with the
Automatic (Delayed Start) startup type. Whereas Automatic services start as soon as Windows
starts (slowing down the user logon), Automatic (Delayed Start) starts in the background,
shortly after Windows starts. It's the perfect startup type for services that you need to
have running but aren't critical to Windows functioning.
Next, you must add the computer account of the collector computer to the local Event Log Readers group on each of the forwarding computers by following these steps on the forwarding computer:
Click Start, right-click Computer, and then click Manage.
Under System Tools, expand Local Users And Groups, and then select Groups. Double-click
Event Log Readers.
In the Event Log Readers Properties dialog box, click Add.
In the Select Users, Computers, Service Accounts, Or Groups dialog box, click Object
Types. By default, it searches only users, service accounts, and groups. However, we need to
add the collecting computer account. Select the Computers check box and clear the
Groups, Users, and Service Accounts check boxes. Click OK.
In the Select Users, Computers, Or Groups dialog box, type the name of the collecting computer. Then, click OK.
Click OK again to close the Event Log Readers Properties dialog box.
Alternatively, you could perform this step from an elevated command prompt or a batch
file by running the following command: net localgroup "Event Log Readers"
<computer_name>$@<domain_name> /add.
For example, to add the computer WIN7 in the nwtraders.msft domain, you would run the
following command: net localgroup "Event Log Readers" win7$@nwtraders.msft
/add.
2.2. How to Configure the Collecting Computer
Windows 7 supports two types of event forwarding, which you specify when you create an
event subscription:
Collector-initiated In collector-initiated subscriptions, the collecting computer establishes a
connection to the forwarding computer.
Source computer–initiated In source computer–initiated subscriptions, the forwarding computer
establishes a connection to the forwarding computer. Source computer–initiated
subscriptions are the only subscription type available in workgroup environments.
If you plan to use collector-initiated subscriptions, Windows 7 prompts you to configure the collecting computer when you create a subscription, as described in the next
section. Alternatively, you can preconfigure a collecting computer by performing these steps:
Open an elevated command prompt by clicking Start, typing cmd, and
pressing Ctrl+Shift+Enter.
At the command prompt, run the following command to configure the Windows Event
Collector service:
wecutil qc
When prompted, press Y.
Windows configures the Windows Event Collector service.
If you plan to use source computer–initiated subscriptions, you need to run winrm
quickconfig on the collecting computer.
Windows Server 2008 also includes the ability to collect forwarded events. However,
versions of Windows released prior to Windows Vista do not support acting as a collecting
computer or as a forwarding computer.
2.3. How to Create an Event Subscription
Subscriptions, as shown in Figure 1 are
configured on a collecting computer and retrieve events from forwarding computers.

To create a subscription on a collecting computer, perform these steps:
In the Computer Management console, right-click Event Viewer\Subscriptions, and then
click Create Subscription.
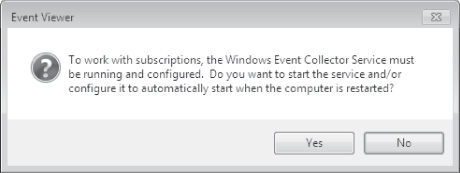
If prompted, click Yes to configure the Windows Event Collector service, as shown in Figure 2.
The Subscription Properties dialog box appears.
In the Subscription Name box, type a name for the subscription, and if you want, type a
description.
If you want, click the Destination Log list and select the log in which you want to
store the forwarded events. By default, events are stored in the Forwarded Events
log.
Select the subscription type, which is either Collector Initiated or Source Computer
Initiated. Selecting Collector Initiated causes the collecting computer to contact the
forwarding computers, whereas selecting Source Computer Initiated causes the forwarding
computers to contact the collecting computer. Then, specify the computers to use as
follows:
If you selected Collector Initiated, click Select Computers. Click Add Domain
Computers. In the Select Computer dialog box, type the name of the computer that will be forwarding events, and then click OK. In the
Computers dialog box, click Test. Click OK when Event Viewer verifies connectivity.
If you selected Source Computer Initiated, click Select Computer Groups. Click Add
Domain Computers or Add Non-Domain Computers. Type the name of the computer that will be
forwarding events and click OK. If you added a non-domain computer, click Add Certificates
and select a certification authority (CA) to be used to authenticate the source computers.
Click OK.
Click Select Events and create the query filter. You must specify either a log or a
source. Click OK.
If you want, click Advanced to open the Advanced Subscription Settings dialog box. You
can configure three types of subscriptions:
Normal This option ensures reliable delivery of events
and does not attempt to conserve bandwidth. It is the appropriate choice unless you need
tighter control over bandwidth usage or need forwarded events delivered as quickly as
possible. It uses pull delivery mode (where the collecting computer
contacts the forwarding computer) and downloads five events at a time unless 15 minutes
pass, in which case it downloads any events that are available.
Minimize Bandwidth This option reduces the network
bandwidth consumed by event delivery and is a good choice if you are using event
forwarding across a wide area network or on a large number of computers on a local area network. It uses push delivery
mode (where the forwarding computer contacts the collecting computer) to
forward events every six hours.
Minimize Latency This option ensures that events are
delivered with minimal delay. It is an appropriate choice if you are collecting alerts or
critical events. It uses push delivery mode and sets a batch timeout of 30
seconds.
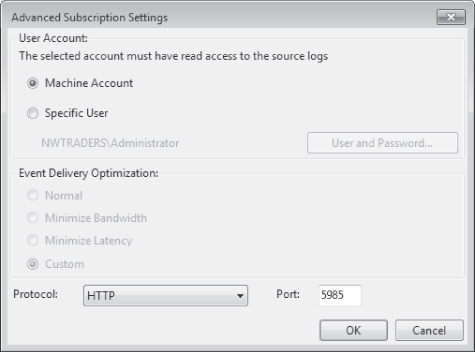
In addition, you can use this dialog box to specify whether the subscription uses HTTP or HTTPS as the protocol. If you create a
collector-initiated subscription, you can use this dialog box to configure the user
account that the subscription uses. Whether you use the default Machine Account setting or
you specify a user, you need to ensure that the account is a member of the forwarding
computer's Event Log Readers group.
Click OK to close the Advanced Subscription Settings dialog box.
In the Subscription Properties dialog box, click OK.
By default, normal event subscriptions check for new events every 15 minutes. You can decrease this
interval to reduce the delay in retrieving events. However, there is no graphical interface
for configuring the delay; you must use the command-line Windows Event Collector (Wecutil)
tool that you initially used to configure the collecting computer.
To adjust the event subscription delay, first create your subscription using Event Viewer. Then,
run the following two commands at an elevated command prompt:
- wecutil ss <subscription_name>
/cm:custom
- wecutil ss <subscription_name>
/hi:<milliseconds_delay>
For example, if you created a subscription named Critical Events and you wanted the delay
to be 1 minute, you would run the following commands:
-
wecutil ss "Critical Events" /cm:custom
-
wecutil ss "Critical Events" /hi:6000
Now, if you open the Subscription Properties dialog box and click Advanced, the Advanced
Subscription Settings dialog box shows the Event Delivery Optimization setting as Custom, as
shown in Figure 3. This option is not
selectable using the graphical interface.
If you need to check the interval, run the following command:
- wecutil gs <subscription_name>
For example, to verify that the interval for the Critical Events subscription is 1
minute, you run the following command and look for the HeartbeatInterval value:
wecutil gs "Critical Events"
The Minimize Bandwidth and Minimize Latency options both batch a default number
of items at a time. You can determine the value of this default by typing the
following command at a command prompt:
winrm get winrm/config
2.4. How to Configure Event Forwarding to Use HTTPS
To configure event forwarding to use the encrypted HTTPS protocol, you must perform the following additional tasks on the forwarding
computer in addition to those described in the section entitled Section 2.1 earlier in this article:
Configure the computer with a computer certificate. You can do this automatically in AD
DS environments by using an enterprise CA.
Create a Windows Firewall exception for TCP port 443.
Run the following command at an elevated command prompt: winrm
quickconfig–transport:https
On the collecting computer, you must modify the subscription properties to use HTTPS rather than HTTP. In addition, the collecting
computer must trust the CA that issued the computer certificate—this will happen
automatically if the certificate was issued by an enterprise CA and both the forwarding
computer and the collecting computer are part of the same AD DS domain.
If you have configured Minimize Bandwidth or Minimize Latency Event Delivery Optimization
for the subscription, you must also configure a computer certificate and an HTTPS Windows
Firewall exception on the collecting computer.
Tip:
CHOOSING EVENTS TO FORWARD
Windows 7 stores a great deal of very useful information in the
event log, but there's even more useless information in there. For event forwarding, you
should focus only on those events to which you can proactively respond.
To identify those useful events that you might want to forward,
examine the event log each time a user calls with a problem. Did an event appear either
shortly before or after the problem occurred? If so, and if the event appears only during
problem scenarios, you should configure that event for forwarding.

