5.2. Installing the Service
After you build the service, you need to install it
before you can use it. Because this is a trigger-start service, you
also need to verify that the service installed correctly. You want to
be sure that the service installed as you intended it to install,
rather than as a standard service. The following steps help you install
the service:
Choose Start => All Programs => Microsoft Visual Studio 2010 =>
Visual Studio Tools. Right-click the Visual Studio Command Prompt
(2010) entry and choose Run As Administrator from the Context menu.
You'll see a command prompt window open.
Change directories to the directory that contains the service.
Type InstallUtil TriggerStartService.EXE
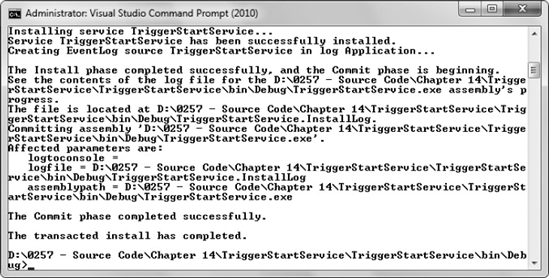
and press Enter. You'll see a number of messages appear as InstallUtil
installs the service. Your command prompt will look similar to the one
shown in Figure 8. The important message appears at the end: "The Commit phase completed successfully."
Open
the Services console found in the Administrative Tools folder of the
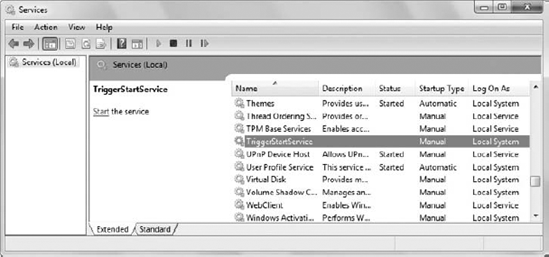
Control Panel. Locate the TriggerStartService entry, as shown in Figure 9.
Notice that the TriggerStartService is set to start manually, not
automatically. In addition, the service should log in using the
LocalSystem account, as shown in the figure. If you see these entries,
then you'll know that the TriggerStartService has at least installed
successfully. However, you still don't know whether it has installed as
a trigger-start service.


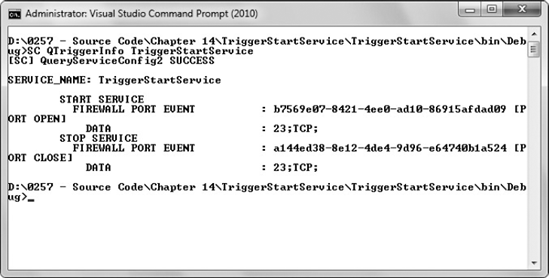
At the command prompt, type SC QTriggerInfo TriggerStartService
and press Enter. The SC utility will tell you the trigger-start service
status of a service when you use the QTriggerInfo command. Figure 10
shows the results you should see. If you see this output, then you know
that the service has installed as a trigger-start service. Notice that
the output tells you that this service is waiting for a firewall port
event, and that it's looking at Port 23 — precisely what you had
programmed into the service.
